Command Groups
As your command library grows, finding the right command can become overwhelming. Command Groups let you organize commands into emoji-labeled folders for quick access.
What are Command Groups?
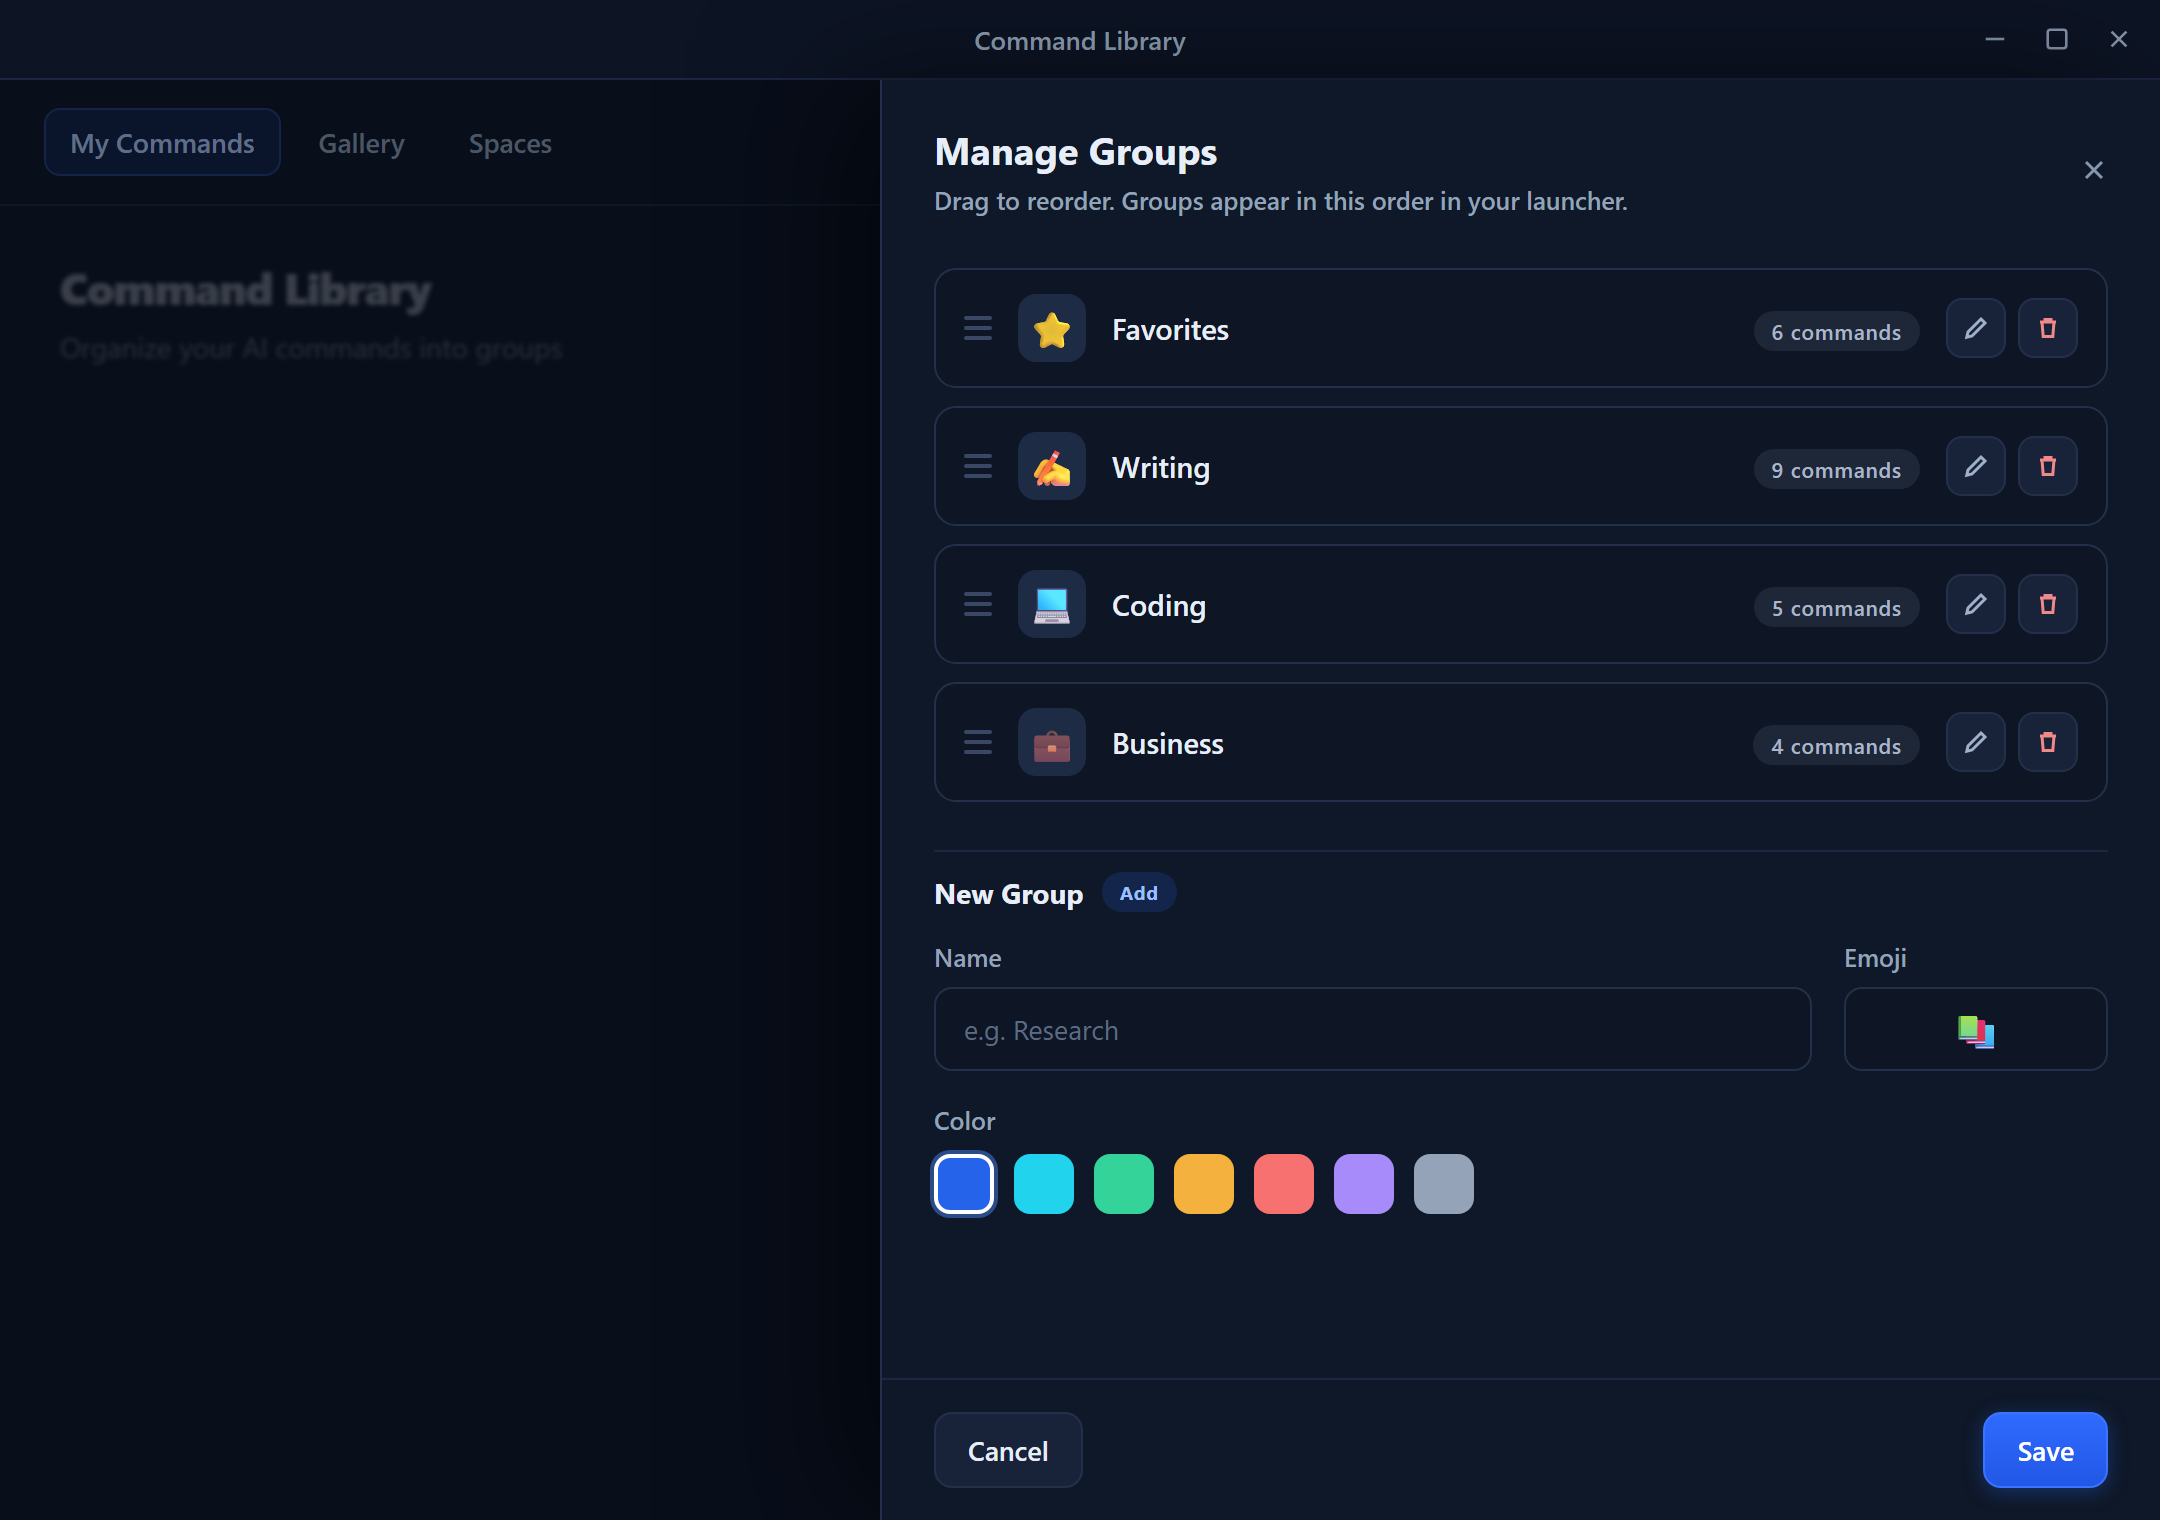
Command Groups are visual sections for organizing your commands in the card view. A group has a name, an optional emoji icon, an optional color, a sort order, and a collapsed/expanded state — all purely for UI organization. Groups are separate from Spaces: a group organizes where a command appears, while a Space provides data context to a command.
A command belongs to at most one group. Commands without a group appear in an automatic Ungrouped section.
Benefits of Using Groups
- Faster navigation — jump straight to related commands.
- Reduced clutter — keep rarely-used commands tucked into a group.
- Logical organization — separate work, personal, and project-specific commands.
- Custom ordering — both groups and the commands inside them are drag-reorderable.
Creating a Command Group
- Open the Dashboard → Commands.
- Click Manage Groups (folder icon), then New Group.
- Enter a Name (max 100 chars), e.g., "Email Tools".
- Optionally pick an Emoji Icon and a Color (hex
#RRGGBB) for the section header. - Save.
Assigning Commands to Groups
Method 1 — During creation: pick a group from the Group dropdown in the command editor.
Method 2 — Editing an existing command: open the command, change its Group field, and save.
Method 3 — Right-click: right-click a command → Move to Group → choose the target group.
Method 4 — Drag and drop: drag a command card onto a group's header to move it.
Reordering and Managing Groups
Both groups and commands have a stored sort order, so your arrangement persists between sessions.
- Reorder groups — drag a group header up or down. The new order is saved.
- Reorder commands within a group — drag command cards to rearrange them; each command remembers its position in the group.
- Rename / change icon or color — open the group from Manage Groups and edit it.
- Collapse / expand — click the header arrow. The collapsed state is remembered per group.
- Delete a group — removes the section; its commands are not deleted, they move to Ungrouped.
Suggested Group Structures
For writers
- Editing — Grammar, Spelling, Tone adjustments
- Creating — Outlines, Drafts, Headlines
- Formatting — Bullets, Tables, Citations
For developers
- Code Review — Explain, Find Bugs, Security Check
- Documentation — Docstrings, README, Comments
- Refactoring — Rename, Simplify, Convert Language
For business professionals
- Email — Reply, Decline, Follow-up
- Documents — Summarize, SWOT, Action Items
- Presentations — Talking Points, Slide Outlines
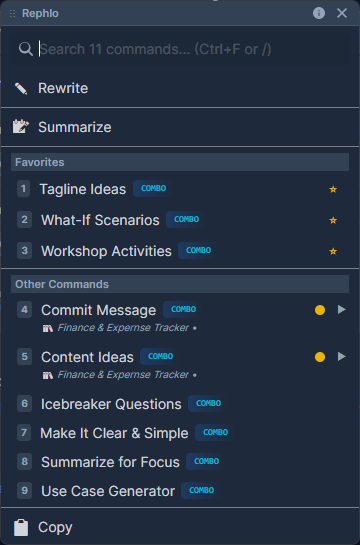
Groups in the Quick-Access Overlay
When you trigger Rephlo over selected text, groups appear as submenus in the command overlay, with your favorites surfaced at the top for one-click access.
Tips for Effective Grouping
- Keep groups small — 5-10 commands per group is comfortable.
- Use clear names — "Email" beats "Misc Writing Stuff".
- Lean on favorites — don't over-group your daily drivers; star them instead.
- Archive instead of hoarding — for commands you've outgrown, archive them rather than parking them in a junk group.
Next: Run your commands fast with Execution Workflows, or browse ready-made commands in the Template Gallery.