Chat & Conversations
Rephlo isn't just for one-shot text transformations. It also features a full Chat Mode for extended, multi-turn conversations with AI — perfect for brainstorming, iterating on ideas, debugging with screenshots, or getting step-by-step guidance with your own documents in context.
What is Chat Mode?
While Commands are great for quick, single-action tasks (like "Summarize this"), Chat Mode lets you have an ongoing dialogue. The AI remembers everything earlier in the conversation, so you can refine, follow up, and change direction naturally.
Chat Interface Layout
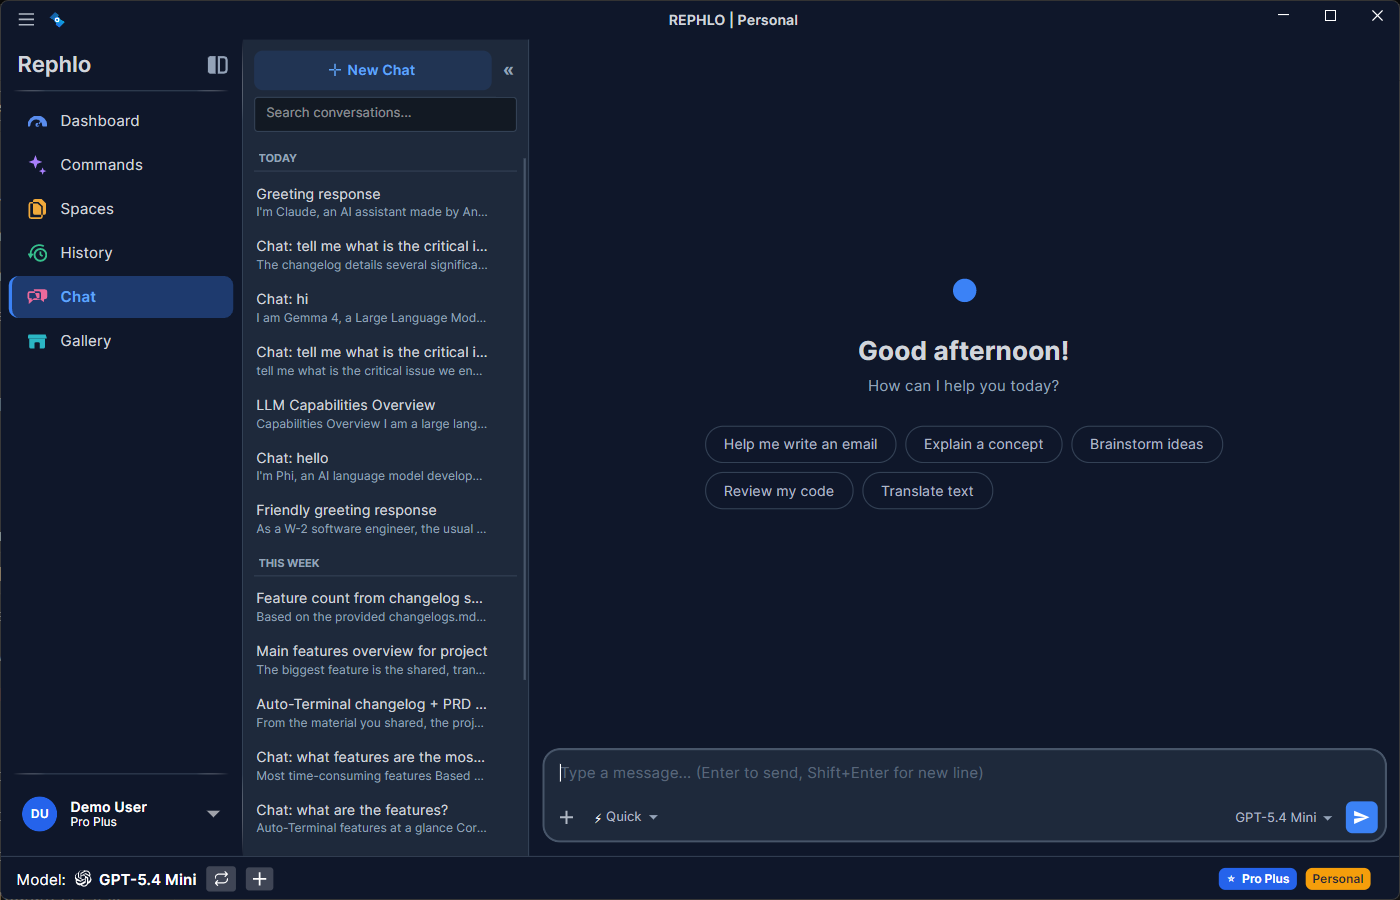
The Chat view has a conversation sidebar on the left and the active conversation on the right. The sidebar has a New Chat button, a Search box, and your conversations grouped by date (Pinned, Today, Yesterday, This Week, Older). The main pane shows the message thread, with the message composer at the bottom. The composer holds the model selector, the thinking-mode selector, a web-search toggle, an attach-file button, and the Space picker. Any Spaces attached to the conversation appear as badges in the header bar next to the title.
Key Features
1. Persistent, Multi-Turn Conversations
- Each conversation is saved automatically as you go.
- Return to previous chats from the Chat section or from Dashboard > Recent Conversations.
- Pick up exactly where you left off — even days later. The full message history is restored.
2. Thinking Modes (Reasoning Effort)
Rephlo lets you choose how much the model "thinks" before answering. Pick a mode from the composer:
| Mode | Icon | Best for |
|---|---|---|
| Quick | ⚡ | Fast, everyday replies — the default |
| Focused | 🧠 | Moderate reasoning for trickier questions |
| Thorough | 🔬 | Maximum reasoning for complex, multi-step problems |
- Thinking modes apply to reasoning-capable models. When the active model supports extended reasoning, the selector is enabled; otherwise it is hidden or disabled.
- Higher effort can produce better answers on hard problems but uses more tokens and takes longer. Start with Quick and step up only when you need it.
3. Web Search
- Toggle Web Search in the composer to let the model pull in current information from the web for a message.
- Availability depends on your provider. Many frontier cloud providers offer built-in web search, so the toggle appears whenever your active provider and model support it (for example, Grok's Live Search, or Ollama with a web-search key). If your provider doesn't support it, the toggle is hidden and any prior selection is cleared automatically.
- On-device models have no built-in web search — a local model can't reach the internet on its own. A web-search connector (MCP) is in development; once it ships, on-device models will be able to fetch up-to-date information through it.
- See Managing Providers for which providers offer web search and how to enable it.
4. Attachments (Images, PDFs, Documents, Text)
You can attach files to a chat message. Rephlo classifies each attachment and handles it appropriately:
| Type | Examples | How it's used |
|---|---|---|
| Image | PNG, JPEG, WebP, GIF | Sent to vision-capable models for analysis |
.pdf | Text is extracted locally; page count is shown | |
| Text file | .txt, .md, .csv, .json, code files | Contents read and included as text |
| Office document | .docx, .xlsx, .pptx | Text is extracted locally and sent as text |
- Paste images directly: copy a screenshot or image and paste it straight into the composer — Rephlo decodes the clipboard image, shows a thumbnail, and stages it for sending.
- Drag-and-drop or browse: drop files onto the composer or use the attach button.
- PDFs and Office documents are converted to text on your machine before sending, so the content works even with providers that don't natively read files — and the privacy redaction step (if enabled) has real text to scan. See Privacy & Data.
- Vision analysis (images) requires a vision-capable model. Check capabilities in Managing Providers.
5. Space-Enhanced Chat
Spaces are your knowledge bases. Attach one or more Spaces to a conversation so the AI can draw on your uploaded documents:
- Attach from the composer: pick a Space from the Space selector. You can attach more than one Space to a single conversation.
- Inherited automatically: when you click Continue Chat after running a command that used a Space, that Space context carries over into the new conversation.
- Attached Spaces appear as badges in the header bar next to the conversation title, and your selection is remembered per conversation.
- The AI draws from your documents on every turn — no need to re-attach or re-paste content.
Tip: Attaching a Space is also what enables prompt caching on supported providers, which can dramatically cut the cost of repeated context. See Prompt Caching.
6. Per-Conversation Model Selection
- Use the model selector in the composer to choose the provider/model for the conversation.
- Your choice is saved per conversation, so different chats can use different models. Switching conversations restores each one's model.
- Unsent text is preserved per conversation too — switch away and back, and your draft is still there.
7. Tools via MCP Connectors
When you have connectors enabled, the AI can call external tools (for example, to look something up in a connected service) during a chat. Tool calls and their results are tracked so you can see what the AI did. This requires a model with tool-calling (function calling) capability and an enabled connector. See MCP Connectors & Tools.
8. Conversation Management
Right-click any conversation in the sidebar to manage it:
| Action | Description |
|---|---|
| Pin | Keep important conversations at the top of the list |
| Rename | Give the conversation a custom title |
| Archive | Hide from the main list (recoverable) |
| Delete | Permanently remove the conversation |
Tip: Pinned conversations always appear at the top, regardless of when they were last used — great for ongoing projects.
When to Use Chat vs. Commands
| Scenario | Use Chat | Use Command |
|---|---|---|
| Quick grammar fix | ✅ | |
| Brainstorming session | ✅ | |
| Multi-step problem solving | ✅ | |
| Translating a paragraph | ✅ | |
| Iterating on a document draft | ✅ | |
| One-click summarization | ✅ | |
| Asking follow-ups about a screenshot | ✅ |
Starting a Chat
Method 1: New Chat (Direct)
- Open the Chat section.
- Click New Chat in the sidebar.
- (Optional) Pick a model, set a thinking mode, attach files, or attach a Space.
- Type your message and press Enter or click Send.
Method 2: Continue Chat (From a Command Result)
- Execute any Command (text or screenshot).
- In the result dialog, click Continue Chat.
- The conversation inherits the Space context (and any captured image) from the command.
- Continue the discussion with full context preserved.
Tip: This is the easiest way to start a Space-enhanced chat — run a relevant command first, then continue the conversation.
Chat Best Practices
Be Conversational
Unlike Commands where you craft a precise prompt, Chat is forgiving:
- "Wait, that's not quite right. I meant…"
- "Can you make it shorter?"
- "Actually, focus on the budget section."
Use References
The AI remembers what you've discussed:
- "Like you mentioned earlier…"
- "Apply that same format to…"
- "Combine those two ideas."
Match Effort to the Task
Use Quick for everyday replies and switch to Focused or Thorough only when a problem genuinely needs deeper reasoning — it saves time and tokens.
Export When Done
When your chat produces something valuable:
- Select the AI's response.
- Click Copy or the copy icon.
- Paste into your document.
Related: MCP Connectors & Tools · Prompt Caching
Next Feature: Organize your commands with Command Groups.