Connectors
Connectors let Rephlo reach into the tools you already use — like Notion, GitHub, Slack, and Google Workspace — so the AI can read and act on real data instead of only the text you paste in. Under the hood they use the Model Context Protocol (MCP), an open standard for connecting AI assistants to external tools.
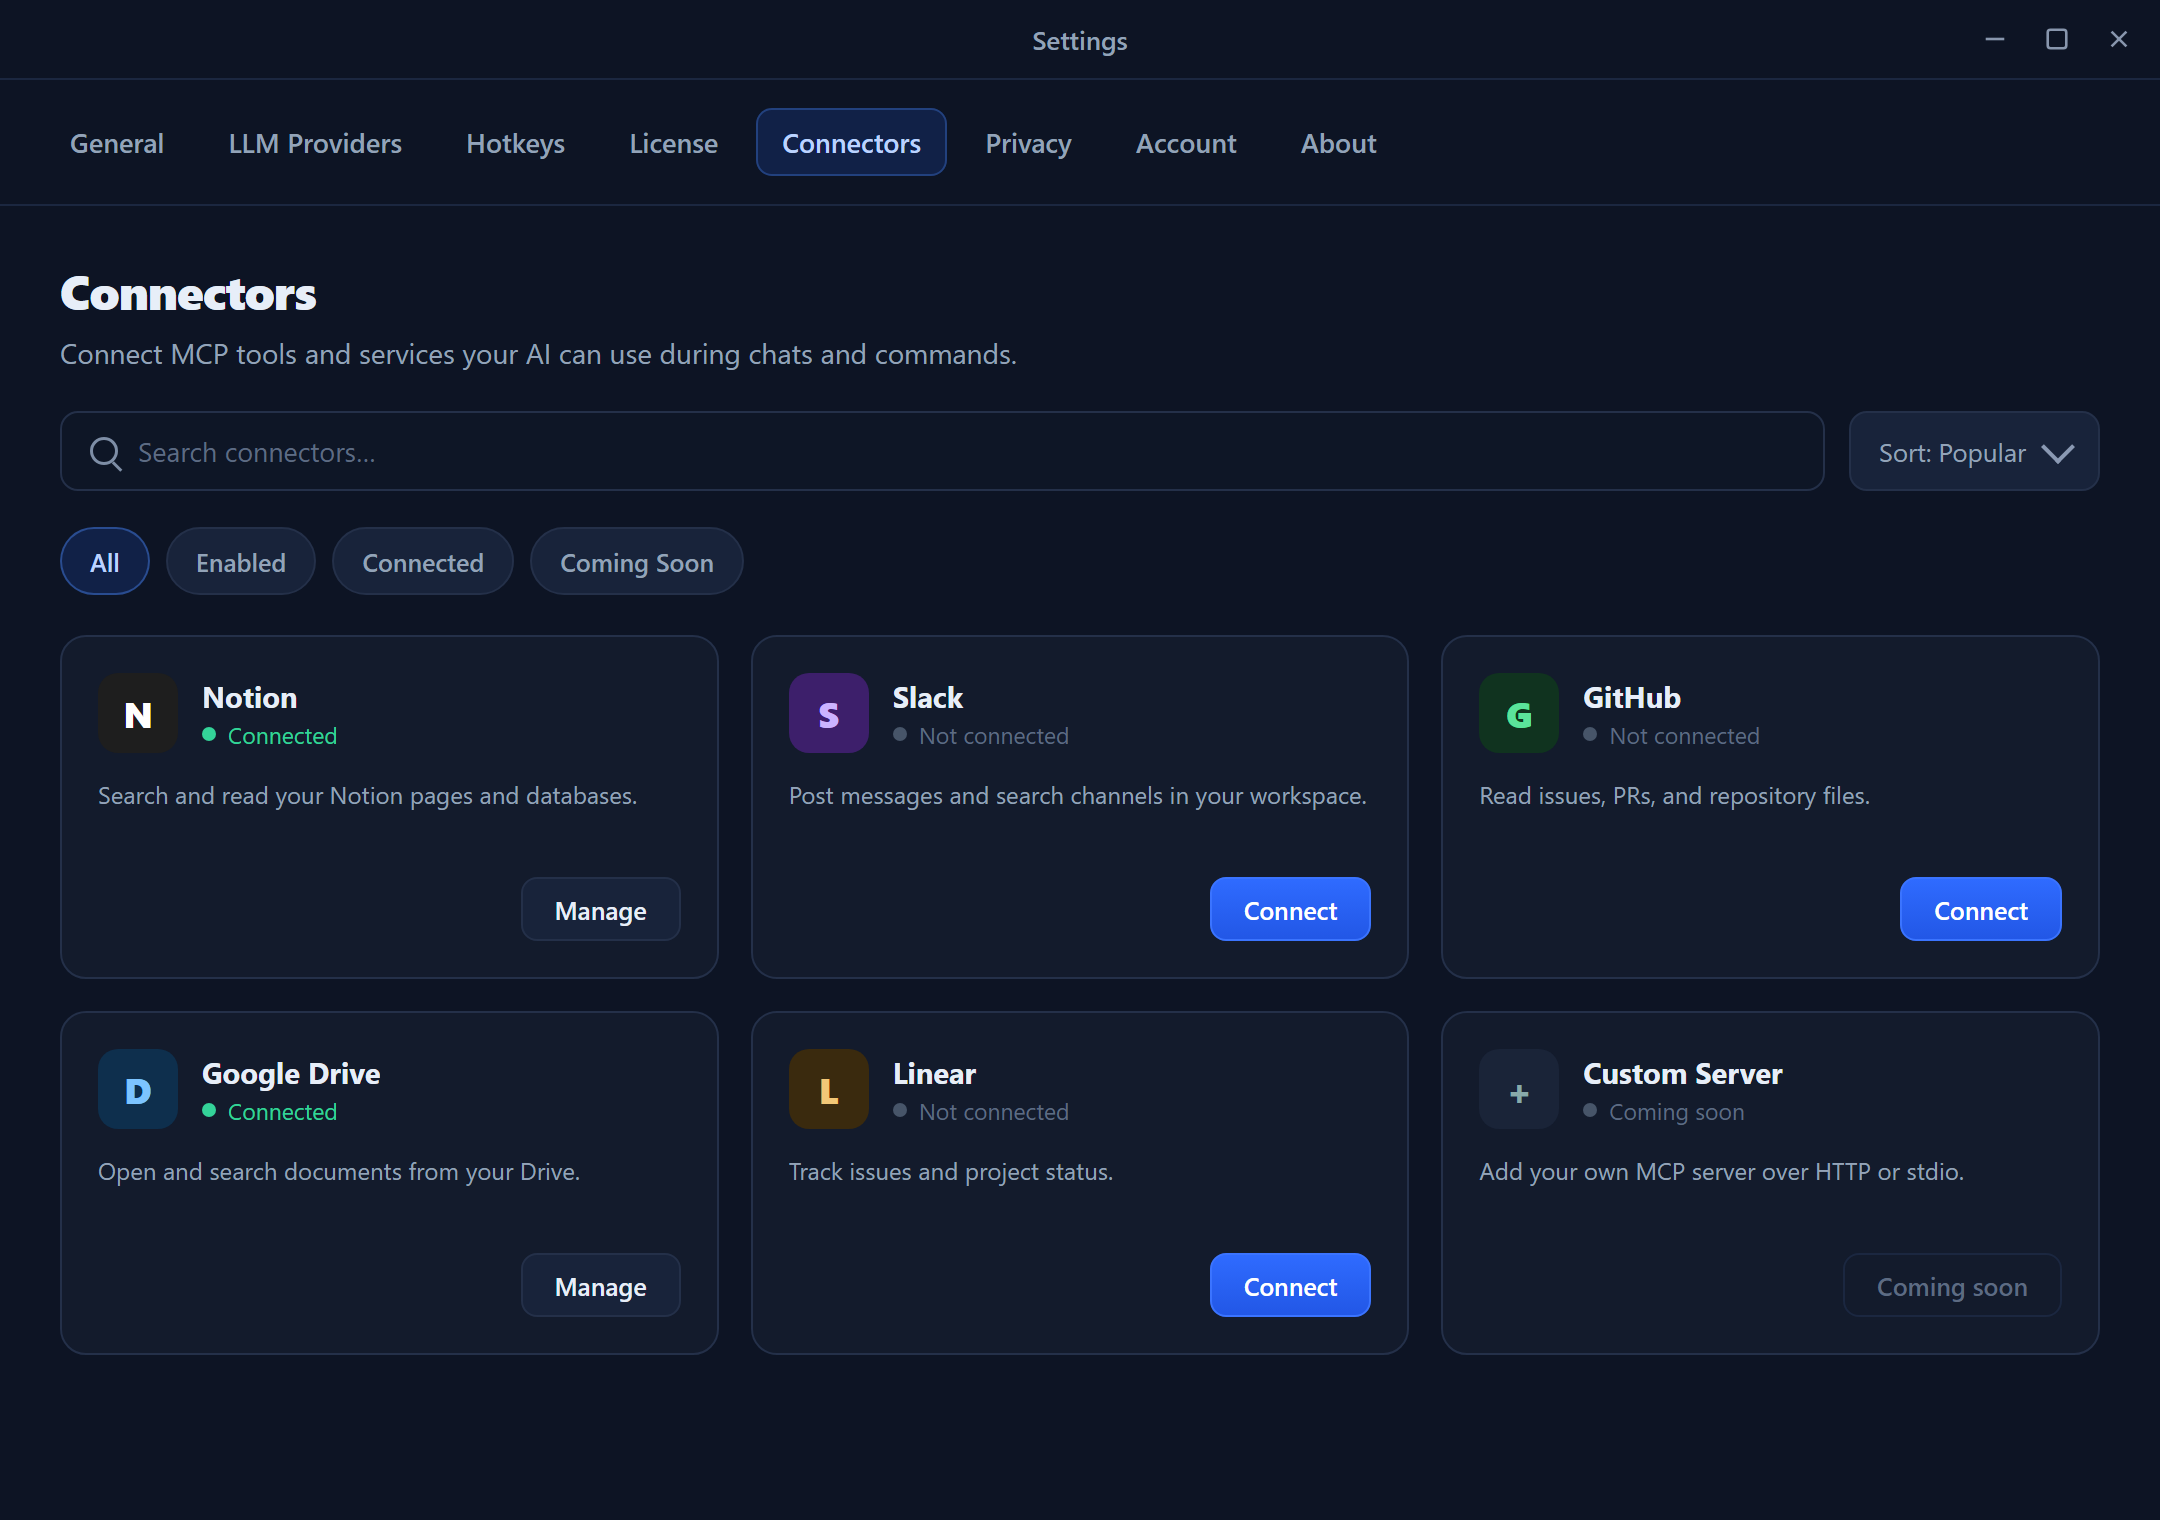
Open the catalog from Settings → Connectors.
Heads up: connectors are rolling out in stages and may not be turned on in every build yet — this is separate from your plan. When connectors are enabled in your build, the Connectors tab is always shown (locked with an upgrade prompt if your plan doesn't include them). If connectors aren't enabled in your build yet, the tab may not appear at all. For a deeper walkthrough of how connectors and tools work in chat, see MCP Connectors & Tools.
Who can use connectors
Connectors are a paid feature, available on Starter and higher plans. If your plan doesn't include them, the tab shows a locked banner (heading "Upgrade to Starter+", with "Connectors are available on the Starter plan and above. Upgrade to connect MCP services.") in place of the connector catalog. Compare plans on the Plans & Pricing page.
The catalog
Each connector appears as a card showing its name, icon, a short description, and a status. Status reflects two different things:
| Status | Meaning |
|---|---|
| Enabled | The connector is shipping and ready for you to connect. |
| Coming Soon | Listed for visibility but not yet available to connect. |
| Connected | You have actively connected an account to this connector. |
"Enabled" describes what Rephlo offers; "Connected" describes what you have set up. A connector can be Enabled (available) but not yet Connected (you haven't linked your account).
Finding a connector
The toolbar at the top of the catalog helps you narrow things down:
- Search — type to filter by name (the search is debounced, so it waits a moment after you stop typing). It ignores accents, so "cafe" matches "Café".
- Filter chips — All, Enabled, Connected, and Coming Soon. Selecting a specific chip turns off "All"; clearing them all returns to "All".
- Sort — Featured (default), A–Z, or Recently used.
The card grid updates in real time as you change the search, filters, or sort.
Connecting a connector
- Find the connector you want and click Connect (or Manage on an existing one).
- A side panel slides in with the connector's details.
- Complete the connector's authentication — depending on the connector this may be an OAuth sign-in, an API key, or a custom configuration.
- Use Test Connection to confirm everything is working, then close the panel.
The card's status updates to Connected immediately — you don't need to leave and re-open the tab.
Managing and disconnecting
Click Manage on a connected card to reopen the side panel, where you can:
- Review the connector's details and connection status.
- Re-test the connection.
- Disconnect to remove the link. Disconnecting only unlinks the account — it doesn't delete anything in the external service.
If a connection fails or its authorization expires, the card shows an error so you know to reconnect.
Adding a custom connector
If you run your own MCP server, use Add custom connector to register it. You'll provide a name, description, icon, the server URL, the authentication method, and any required fields. Once saved, it appears in the catalog alongside the built-in connectors.
Using connectors in chat
Connectors come alive in Chat & Conversations. When a connected connector exposes tools, the AI can call them mid-conversation — for example, to look something up in Notion or open an issue in GitHub. Tool calling requires a model with function-calling capability; make sure your active provider supports it (see LLM Providers).